 Anyone who has seen the new visual identity for Ubuntu and Canonical probably noticed the marketing material includes several stunning images created of differently sized dots; inside the Ubuntu Lucid CD sleeve, on banners and such. What most probably didn't know is that they were created using open source software.
Inkscape made it easy to create a pattern of objects which traces a source image using the "Create Tiled Clones" dialog. A clone is a linked copy of an original vector object and changes when the original changes.
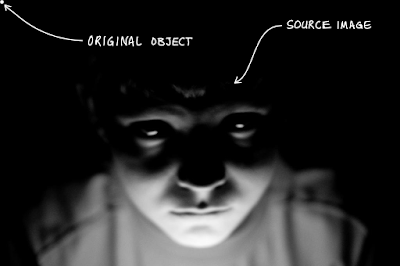
Start by opening the image you want to trace (the source image) with Inkscape. Your source image can be anything, bitmap or vector objects. It helps to use an image with enough contrast, the right perspective to make the subject discernible when simplified, etc.
 Next, create the original object you want to use to trace the source image. You can use any vector shape or object. Select the
original object and make sure it is at the top left position of your
image (or where-ever you want the dot grid to begin).
Next, create the original object you want to use to trace the source image. You can use any vector shape or object. Select the
original object and make sure it is at the top left position of your
image (or where-ever you want the dot grid to begin).For the sake of this explanation, I've used an image of my son and gone through the process.
The Shift and Trace tabs were of specific interest to us. Shift allows you to add spacing between the tiled clones (Shift X;Per Column, Shift Y; Per Row), offset them and more.
The Trace tab is where the magic happens. Be sure to select "Trace the drawing under the tiles" to turn the effect on. After that, there are 3 simple steps: 1) get a value from the source image, 2) do some optional processing on that number and 3) apply the final value to some attribute of the clone.
In Detail:
- Choose what information should be read from the source image. You can choose between "Color", "Opacity" or any single channel of the RGB or HSL color models. Anything other than the "Color" option averages the value of the channel chosen over the area of the source image covered by the bounding box of the clone. This is used to change one or more attributes of the clone in step 3. We found that "L" (luminosity) best accomplished the task. Note: If you use the "Color" option be sure to unset both the fill and stroke of the original tile.
- Process the information read from the source image. "Gamma correct" increases/decreases the value chosen and allows you to fine tune aspects of the pattern, "Randomize" sets the percentage of randomization and "Invert" flips the value.
- Define which attribute of the clone should be effected by the value resulting from step 2. The "Color", "Size", "Opacity" and the probability of "Presence" of a clone can be changed. Any combination of these is also allowed. We chose "Size".
After that, just hit create. Undo is your friend, given the right source image and with time and practice it is simple to create a tiled pattern which traces and image. Here is what I came up with, kinda spooky - it's going to be the cover of my first book.
My tip: check out Dmitry Kirsanovs' "The Book of Inkscape" from No Starch Press. It has *everything* you need to know about Inkscape.


Thanks for this! I love learning inkscape tricks.
ReplyDeleteHello Kenneth,
ReplyDeleteI made everything what you taught, but I didn't get and I didn't undertand how you got. Can you make a tutorial video for me to undertsand?
I'm a graphic design student too. I use more Inkscape.
I'm really deaf-mute.
Thank you for your attention and understanding!
Hi Gustavo,
ReplyDeleteIf you're in irc chat on the freenode server, my nick is kwwii. I am always in the ubuntu-artwork channel (#ubuntu-artwork).